The project is in essence quite simple. As Life Sciences students, they have become intimately familiar with the UV-visible light spectrometer. They have performed assays, scans, collected time data. All manually. All recorded by hand. The spectrometers we use are quite basic, a Jencons 6305 which is quite dated by modern standards. However, it does have a serial interface (RS232) and the manual lists the communication protocol so there is every scope for getting it connected to a microcomputer. So this is what we do - connect the Pi to the spec and the students are then given free creative reign to design and develop their own application.
There are a few technical hurdles to overcome. We have used Pi Zero, a sub £10 computer. However, by the time you have added an HDMI converter (£6) and a USB extension (£10) it is not very different in cost to a full Pi 3 which has much more processing power. The jury is out on whether we should change as we upgrade.
For the serial interface we have used the RS232 interface from ABelectronics (all links at the end of the post). This is a board with the header pins that has a voltage shifter (important to avoid blowing up the Pi) and an RS232 9 pin D sub connector. Just what we need to connect to the spec using the 9/25 way serial lead that is supplied with it (and is probably in a box at the back of the technicians cupboard). There are a few gotchas. Those used to using computer to computer serial connections are probably unused to hardware flow control. This is NOT implemented on the serial board so it requires additional jumpers to ensure that the computer and spec can communicate. In essence, with hardware that can take time to respond or process information, there are parallel channels (4 of the other leads) that communicate whether the sender and recipient are ready to send/receive.

Having connected the correct pins together and to a logical high, communication is enabled. The way I have done this is a bodge - the signal is always at ready so any delays that are necessary are implemented in software. The Pi does need to be enabled for serial communication (ON) with the serial terminal OFF. This can be done in raspi-config very easily in the Interfaces section.
For a novice programming class, dealing with the intricacies of serial communication is a bit more advanced than they need so I provide a python module that does the heavy lifting. The students access this by cloning from Github (link below) and can then enable a spectrometer very simply.
from J6305 import SpectrometerThat is the essence. There are methods for controlling all the options the spec gives, and some utility methods such as spec.scan(start, stop, interval) which performs a scan across wavelengths from low to high. The module is documented so students can identify useful methods with help(spec) and by reading the source.
spec = Spectrometer()
spec.set_wavelength(420)
(absorbance, wavelength) = spec.absorbance()
So what can we do with a computer controlled spec that we cannot do otherwise? This is given over entirely to the students. We develop in a dry lab so have no ability to use reagents in the specs. I do however have samples of transparent coloured perspex generously donated by Kitronik, and theatre lighting gels from Rosco which provide a rich selection of options to work with.

Some students choose to implement a kinetics project, others projects to determine the difference between two samples in full wavelength scans. In a previous year, one group enabled the spec to translate the colour of a pH indicator solution to the pH of the sample. In all cases, the code they develop should provide full instructions to the user, and be well documented and under version control. We use Bitbucket, the students hold and manage their own repositories there.
This week was week 1 of three. The students get 3 4 hour lab sessions over the three weeks, with time in between to work together on formulating ideas and writing code that can then be tested in the lab.
So apart from saving time and frustration, and performing the analysis afterwards, what else can we do? One of my colleagues runs a cell culture module and they use Luciferase, or they would if we had enough luminometers to make it viable for a class of 40. Having read the spec manual I knew there were commands for turning off the lamp (closing the shutter) and also for reading the raw voltage from the sensor. Could this be used to repurpose the spec as a luminometer? It is not possible to do this from the front panel.
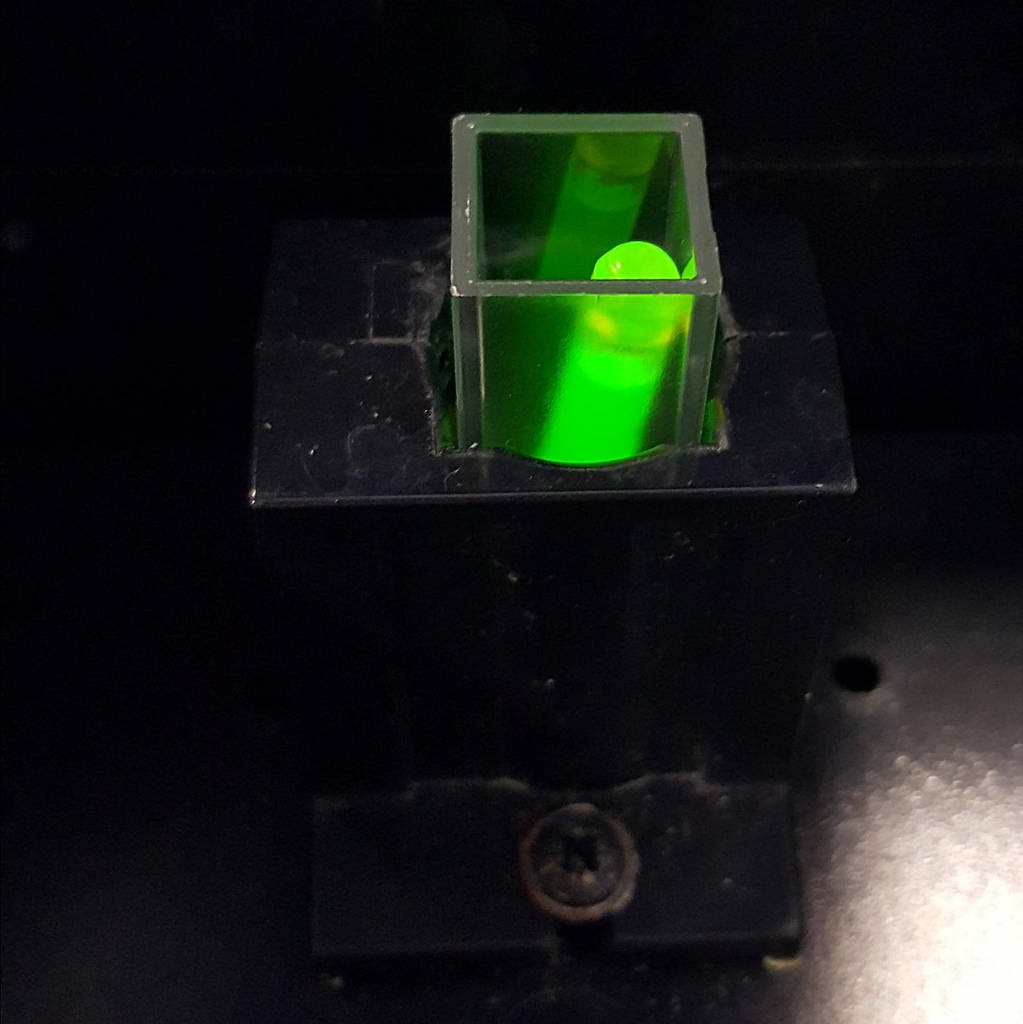
I needed a light source that was dry and could fit in a cuvette. The answer came with a pack of fishing glow sticks I had bought during one of the local supermarket 'specials' a few years back with the idea of using them for a project that never materialised. I cracked one open and left it overnight. Into the lab, and I could run the code to control the spec. Turn off the lamp, check the voltage. Place the glow stick in and check the voltage. Take a new glowstick and crack it open, check the voltage.
Bingo! We can measure a clear change that should give a sufficient resolution.

My colleagues are happy, and the next step is to try a proper luciferase assay, then to add an LCD screen and to build a box to turn this into a lab-safe add on for the spec.
Links:
Jenway 6305 Spectrometer
AB Electronics serial interface for Raspberry Pi
www.Kitronik.co.uk - supplier of materials
www.thepihut.co.uk - Supplier of Raspberry Pi related goods
www.pimoroni.com - Supplier of Raspberry Pi related goods.
github repository for UvSpec code
Rosco Laboratories - Theatre gels and other great lighting products
No comments:
Post a Comment